

An oversized bow Christmas tree is the rare holiday trend that actually suits a small apartment: a few big, well-placed bows do the visual work of dozens of ornaments, which means less money spent, less storage needed, and a tree that looks intentional rather than crowded. For first-time renters decorating a first tree on a tight budget, that trade is hard to beat.
This guide scales the look down for rented space without watering it down. You will learn how to size bows for a slim or tabletop tree, make your own for a fraction of store prices, place them so the tree looks styled rather than scattered, and take everything down in January without a mark on the walls or a dent in your deposit.
Direct answer: An oversized bow Christmas tree uses a small number of large ribbon bows — typically 5 to 9 on a small tree — as the main decoration, spaced from top to bottom and wired to branches. For renters, DIY wired-ribbon bows cost far less than buying pre-made ones, attach without nails or hooks, and pack flat for next year.
Executive Summary

The trick to this look is proportion, not quantity. One bow that is too small disappears into the branches; one that is too large swallows a slim tree. The sections below give you a simple sizing rule by tree height, a comparison of ribbon types by cost and durability, and a step-by-step method for making a full, structured bow from a single spool of wired ribbon.
You will also find placement patterns that work in tight corners, color palettes that look polished on a budget, a bow-as-topper option for ceilings too low for a star, and renter-safe attachment and storage methods so the whole look survives the move to your next apartment.
1. Why Bows Beat Ornaments

A box of ornaments fills a tree by accumulation: the more you add, the better it looks, and the bill climbs with every box. Bows work the opposite way. Each one covers a large patch of branches, so five to nine bows can carry an entire small tree, with lights and a handful of simple baubles filling the gaps.
That math matters in a rental. Fewer pieces mean less to buy, less to store in a closet that is already doing double duty, and less to pack when the lease ends. Bows also weigh almost nothing, so they do not drag down the thinner branches of a budget artificial tree the way heavy glass ornaments can.
There is a visual benefit too. A small tree crowded with ornaments can read as cluttered from across a studio apartment. A few large bows read as a deliberate design choice, even from the doorway.
2. Sizing Bows to Your Tree

Bow size should follow tree height, not the size of the bows you saw in a store display built around a nine-foot tree. A useful starting rule for apartment-sized trees:
| Tree height | Bow loop width | Number of bows |
|---|---|---|
| Tabletop, 2–3 ft | 4–5 inches | 3–5 |
| Slim/pencil, 4–5 ft | 6–8 inches | 5–7 |
| Standard small, 6 ft | 8–10 inches | 7–9 |
Loop width means the width of one finished loop, not the whole bow tip to tip — a bow with 8-inch loops will span roughly 16–18 inches across once the tails are added. If you are between sizes, go smaller: an undersized bow looks like an accent, while an oversized one looks like a mistake.
Measure your tree’s widest point too. On a slim pencil tree, a bow wider than about a third of the tree’s diameter tends to overwhelm the silhouette. On a fuller 6-foot tree, you have more room to go bold.
3. Velvet, Satin, or Budget Ribbon

Ribbon choice decides both the look and the cost, and the right pick depends on how much structure you need.
- Wired velvet gives the richest look and holds its shape all season, which is why it dominates the trend photos. It is also the priciest option per yard, so reserve it for the topper bow or the three most visible bows and use a cheaper ribbon elsewhere.
- Wired satin is shinier, lighter, and usually cheaper than velvet. It reflects string lights nicely, but thin satin can look limp by January if it is not wired.
- Wired grosgrain or burlap-style ribbon is the budget workhorse: sturdy, matte, and forgiving for first-time bow makers. It reads more rustic than elegant, which suits a casual apartment better than a formal look.
- Unwired ribbon is the one to skip for this project. Without a wire edge, large loops collapse within days, and no amount of fluffing brings them back.
Whatever you choose, buy wired ribbon at least 2.5 inches wide — narrower ribbon cannot form loops large enough to read as “oversized.” One 10-yard spool typically yields three to four large bows with tails, so two spools usually cover a whole small tree. Check the per-yard price before falling for a bargain spool: craft-store ribbon sold by the spool can cost more per yard than the same ribbon sold by the yard at a fabric counter.
4. DIY Oversized Bow, Step by Step

Making your own bows is where the renter budget really wins. Pre-made large bows are often priced as statement pieces; a DIY version from wired ribbon costs a fraction of that and lets you match your exact color scheme. You need wired ribbon, floral wire or a chenille stem, and scissors.
- Cut your length. For an 8-inch-loop bow, start with about 3 yards of ribbon. Longer tails need more; measure generously, since trimming is easy and splicing is not.
- Form the first loop. Fold the ribbon into a loop about 8 inches across, pinching the center. Keep the “good” side of the ribbon facing out.
- Build outward. Make two more loops on each side, each slightly smaller than the last, pinching all of them together at the center. Three loops per side gives a full, layered bow; two per side gives a simpler, flatter one.
- Add the tails. Before securing, cut a separate length for two tails, fold it in half, and lay it behind the loops so the tails hang below the bow.
- Wire the center. Wrap floral wire tightly around the pinched center several times, then twist the ends together at the back. Leave a few inches of wire free — this is what you will use to attach the bow to the tree.
- Shape and trim. Fan the loops out, pull the inner loops slightly forward for depth, and cut the tail ends at an angle or in a V-notch for a finished look.
Practice on your least visible bow first. The second one always looks better than the first, and by the third you will have the rhythm down. If a loop collapses, the ribbon is probably unwired or too narrow — switch materials rather than fighting it.
5. Placement That Looks Intentional

Random scattering is the fastest way to make big bows look like clutter. A simple pattern fixes it: work in a loose zigzag down the tree, placing one bow, then the next one lower and to the opposite side, so the eye travels around the tree rather than down one column.
Push each bow partway into the branches rather than perching it on the tips. The bow should sit at the same depth as the ornaments around it, with a few branch tips poking through the loops — that is what makes it look like part of the tree instead of something stuck on afterward. Vary the depth slightly: one bow deeper, the next a little prouder, so the tree keeps its dimension.
Keep the biggest bow near the top third of the tree, not at the very top, and step sizes down slightly toward the base if you made bows in different sizes. Leave the lowest branches mostly clear if the tree sits in a walkway — tails at ankle height snag on bags, pets, and vacuum cleaners.
6. Bow as Tree Topper
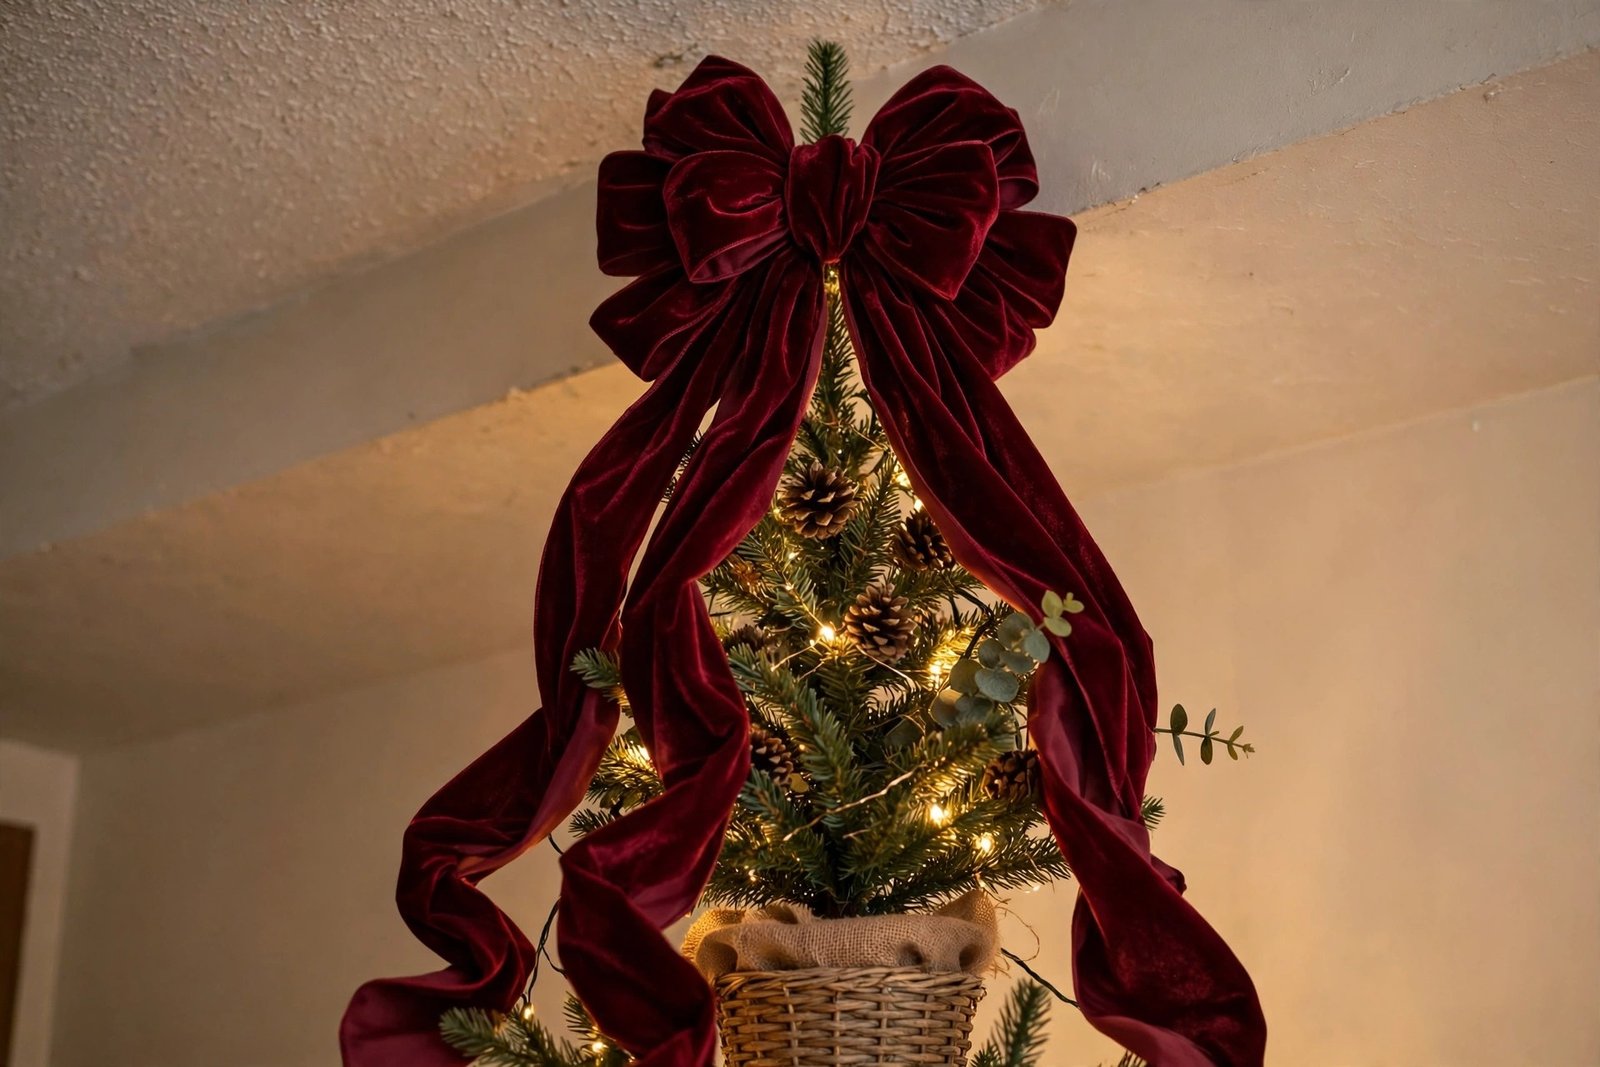
A traditional star or angel needs clearance above the tree, and in a rental with standard eight-foot ceilings and a six-foot tree on a stand, that clearance often does not exist. A large bow solves the problem: it crowns the tree without adding height, and it ties the whole bow theme together.
Make the topper bow about one size larger than your side bows, with longer tails that cascade down the top branches. Wire it to the top branch itself, not to the trunk tip alone, so it sits upright rather than flopping forward. Angle the loops slightly outward so the bow reads from across the room, not just from directly in front.
If the bow topper still feels unfinished, add two or three small matching baubles tucked into the branches just below it. That small cluster reads as a deliberate crown and costs almost nothing.
7. Color Palettes on a Budget

Limiting yourself to one or two ribbon colors is the single cheapest way to make a bow tree look expensive. A tree in five different ribbon colors reads as leftover supplies; a tree in one color with one metallic accent reads as a plan.
Palettes that work well in small, light-limited apartments:
- Classic red velvet with gold baubles. The highest contrast against green branches, so it reads well even in a dim corner.
- Burgundy with champagne or cream. Softer than red, and the lighter accent keeps a small room from feeling dark.
- Forest green on a flocked or white tree. Monochrome and modern; the texture difference between ribbon and branches does the work.
- Black and gold. Dramatic and surprisingly forgiving — black ribbon hides dust and fading, and gold lights warm it up.
Buy all your ribbon in one trip if you can. Dye lots vary between batches, and two “burgundy” spools bought weeks apart can look like different colors on the same tree.
8. Renter-Safe Attachment and Removal

Bows attach with the wire you already left at the back of each bow: wrap it around a branch, twist, and tuck the ends into the foliage. No nails, no adhesive hooks, no holes in the wall — and nothing for a landlord to flag at move-out. For more ideas in this vein, see the Decorating & Small Space Living section.
For a tree that stands against a wall, resist the urge to anchor garland or ribbon to the wall itself. Command-style hooks are the usual renter workaround, but even those can pull paint on older walls, and this look does not need them: everything lives on the tree. If a bow keeps slipping on a sparse artificial branch, wrap the wire around two branches instead of one, or add a small ornament hook as a secondary anchor.
At takedown, untwist the wires rather than pulling bows off — yanking crushes the loops and can snap brittle artificial branch tips. A crushed bow can usually be refluffed, but a snapped branch tip cannot be repaired invisibly.
9. Styling Pencil and Tabletop Trees

Small trees are where this trend actually started making practical sense, because a pencil tree has so little branch volume that ornaments alone can look sparse. Bows fill that volume without weight.
On a pencil tree, use fewer bows than the table suggests — four to five well-spaced bows beat seven crowded ones — and keep tails shorter so they do not tangle with neighboring branches. Place bows on the front-facing side and the two visible sides; the back against the wall needs nothing.
On a tabletop tree, scale everything down: 4–5 inch loops, shorter tails, and a single small bow as the topper rather than a large one. A tabletop tree sits at eye level, so flaws show more — check the back of each bow for visible wire ends and tuck them in before calling it done.
10. Storing Bows for Next Year
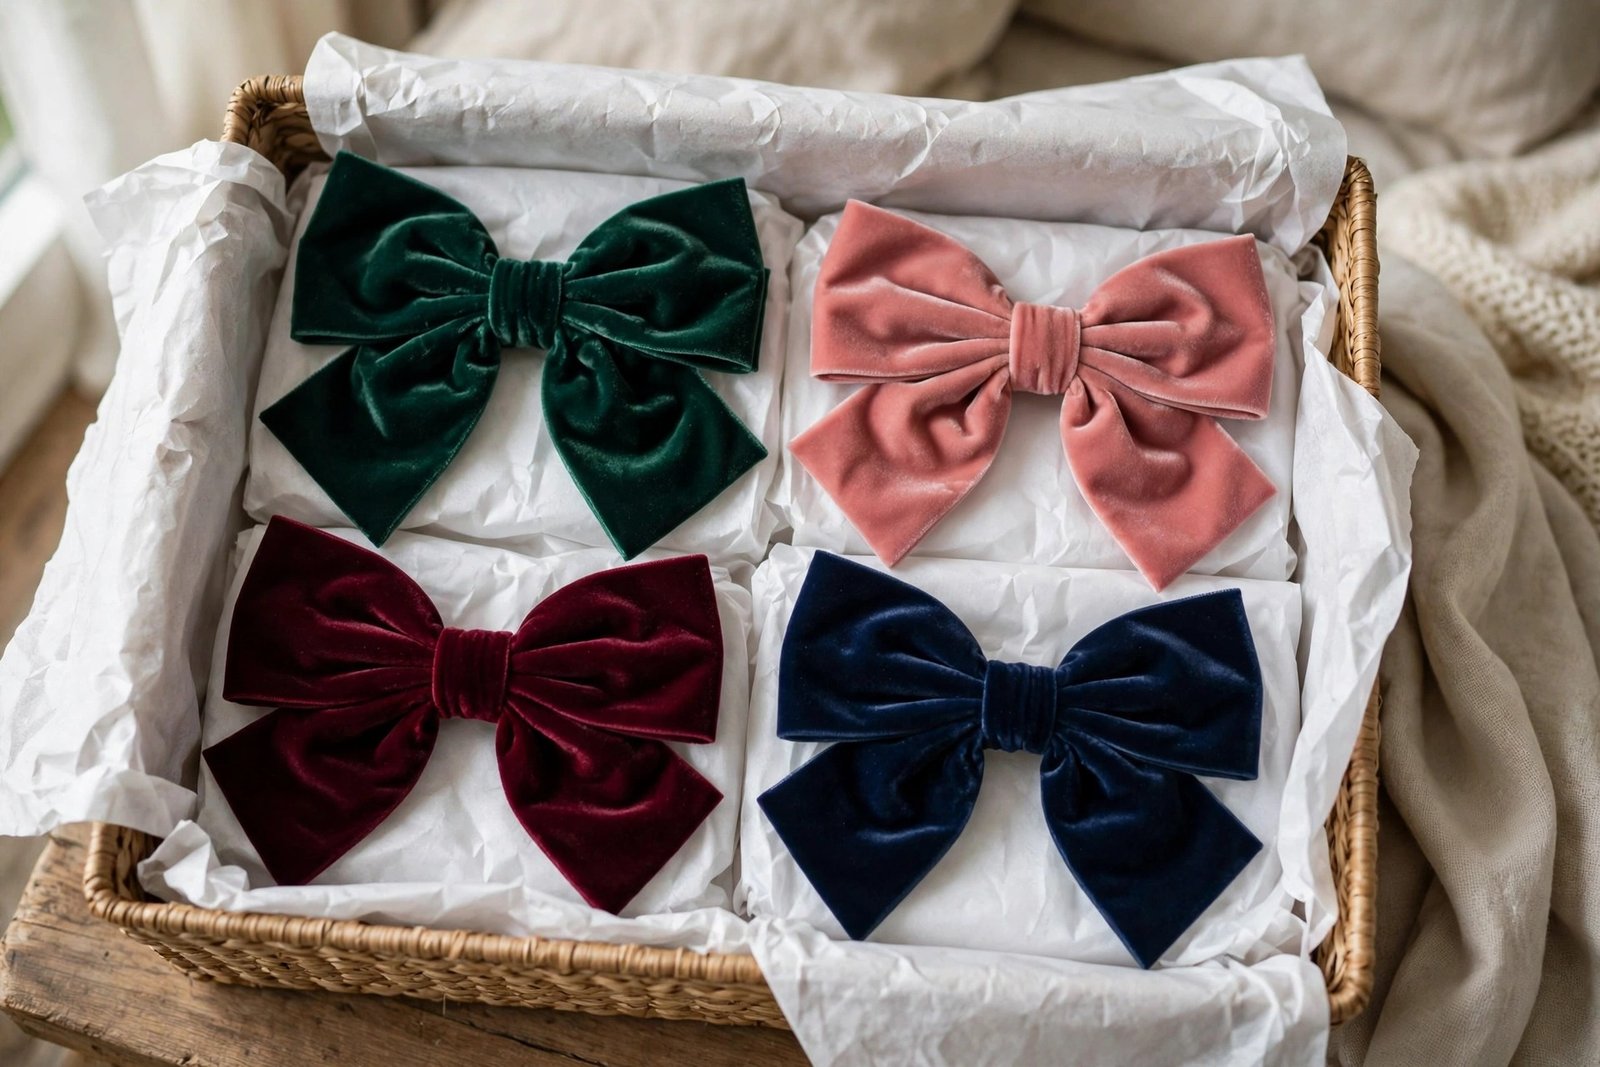
The best reason to make your own bows is that they are reusable, but only if they survive storage. Stuffing them loose into a bin is how loops get crushed flat by February.
Lay each bow flat in a box lined with tissue paper, stacking no more than two or three layers with tissue between them. Do not hang them from hooks in a closet — gravity stretches wired loops out of shape over months. Label the box with the color and count so next December you know what you already own before buying more ribbon.
If a bow comes out of storage looking tired, a quick refluff usually revives it: pull the inner loops forward, straighten the tails, and re-cut the tail ends if they have frayed. Velvet can be steamed lightly from a distance if it has picked up creases, but keep heat away from satin, which can watermark.
Practical Asset: Bow Size and Ribbon Cheat Sheet
Use this before you buy ribbon so you come home with the right amount the first time:
- Tabletop tree (2–3 ft): 4–5 inch loops, 3–5 bows, about 1 spool (10 yards) of 2.5-inch wired ribbon.
- Slim/pencil tree (4–5 ft): 6–8 inch loops, 5–7 bows, about 2 spools.
- Standard small tree (6 ft): 8–10 inch loops, 7–9 bows, about 2–3 spools.
- Topper bow: add roughly half a spool beyond the side-bow count, since its loops are larger and its tails longer.
- Budget tip: make the three most visible bows (top third, eye level) from velvet and the rest from a cheaper wired ribbon in the same color family.
FAQ
How many oversized bows do I need for a small Christmas tree?
For a 4–6 foot tree, 5 to 9 bows is the right range: fewer looks sparse, more looks crowded. Start with five, step back, and add more only where you see bare patches.
Can I make large Christmas bows without a bow maker?
Yes. The step-by-step method above uses only ribbon, wire, and scissors. A bow maker speeds up repeat production, but it is not necessary for a handful of bows, and hand-formed loops look less uniform in a good way.
What width ribbon works best for big tree bows?
At least 2.5 inches wide, and wired. Narrower ribbon cannot form loops large enough to read as oversized, and unwired ribbon collapses within days.
How do I attach bows to a Christmas tree without damaging it?
Wrap the floral wire at the back of each bow around a branch and twist it closed, tucking the wire ends into the foliage. This holds securely on both real and artificial trees and leaves no marks when removed.
Are oversized bows cheaper than ornaments?
Usually, yes, for a small tree. Two to three spools of wired ribbon can cover a whole tree, while filling the same tree with ornaments typically takes multiple boxes. DIY bows also last for several seasons if stored flat.
Will big bows work on a pencil tree?
Yes — pencil trees are one of the best candidates, since bows add visual volume without weight. Use four to five bows with shorter tails, and place them on the visible sides only.
Can I use a bow instead of a star topper?
Yes. A bow one size larger than your side bows, wired to the top branch with long cascading tails, crowns the tree without adding height — useful in rentals with low ceilings.
How do I keep velvet bows looking good all season?
Choose wired velvet so the loops hold their shape, keep the tree out of direct sunlight to slow fading, and refluff the loops once mid-season if they get compressed by nearby branches.
Conclusion

A statement tree does not require a statement budget. With a few spools of wired ribbon, an hour of bow-making, and a placement pattern that puts the biggest bows where the eye lands first, an oversized bow Christmas tree can turn a small rental corner into the best-dressed spot in the apartment — and pack flat into a single box when the season ends. Start with five bows, step back, and let the tree tell you whether it needs more.

Maren started MyFirstLease after a rough first lease taught him everything the internet didn’t. He covers the logistical side of renting — move-in checklists, utilities, and the unglamorous first-week stuff nobody explains — and oversees everything published on the site.


